


Introduction
In an era where digital workflows are increasingly complex, leveraging the right platform can make the difference between friction and flow. The keyword “quikconsole com” refers to Quikconsole Com, a versatile web-based console and productivity hub designed to centralise tools, streamline tasks and empower users across roles from freelancers to enterprise teams. This article offers you a detailed walkthrough: how to engage with Quikconsole Com, set it up effectively, unlock its features, avoid pitfalls and integrate it into your modern tech stack. Whether you’re managing servers, collaborating on projects, or simply looking for all-in-one productivity access, mastering this platform will give you clarity, speed and efficiency.
Sign Up for Quikconsole Com and Create Your Dashboard

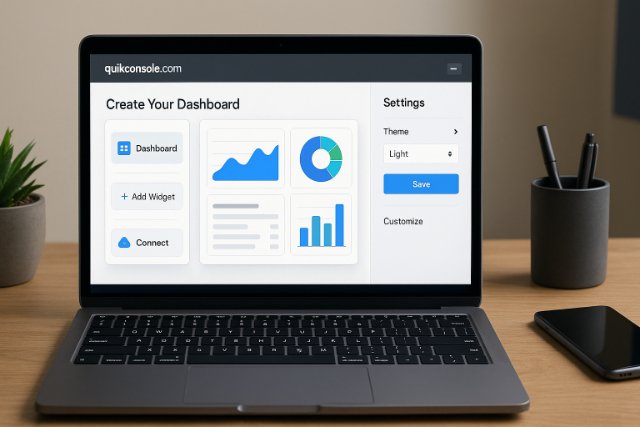
Getting started with Quikconsole Com begins by creating your account and customizing your personal dashboard. Visit the official platform homepage and click “Sign Up.” You’ll be prompted to enter a valid email address, set a secure password, and verify your account through an activation link. Once verified, Quikconsole Com grants you access to your central control panel, your personal workspace. This dashboard is the foundation of your digital environment, where all integrations, automation workflows, and monitoring tools will live. A well-structured onboarding ensures you start with clarity and purpose.
After account creation, the next step is building your dashboard layout. The dashboard is modular, meaning you can add, remove, or resize panels to reflect your workflow. Common modules include analytics trackers, server monitors, project boards, chat panels, and file storage tools. Select modules that align with your goals: a developer may prefer deployment monitors, while a project manager may prioritize task timelines. Once modules are added, label each panel meaningfully and position them strategically to minimize visual clutter.
Finally, personalize your workspace for efficiency. Set your preferred theme (light/dark), adjust notifications, and enable real-time data refresh. Configure a default landing tab for the most-used tools to load automatically.
Quikconsole Com’s adaptability allows you to manage both solo and collaborative tasks. Whether you’re running multiple client projects or overseeing infrastructure, a well-designed dashboard enhances productivity, clarity, and accessibility across all digital assets.
Register Your Account
Begin by navigating to the official site and creating a new account. Use a valid email, choose a strong password, verify your email and set up your profile. This initial step unlocks access to the dashboard and tools.
During registration you will be asked to fill in basic information (name, company/role optionally) and choose your first workspace. Having planned your workspace purpose (personal productivity vs team usage) makes the setup smoother.
Once you’ve registered, you’ll land on the main dashboard. Think of it as mission control: you’ll see modules, widgets, server-links or task panels depending on your plan. A well-configured dashboard ensures you won’t waste time hunting for tools later.
Configure Your Workspace Layout
You’ll need to select or customise your layout: grid, list, tabbed view, or a mix. Choose a structure aligned with how you work (e.g., separate tabs for “Servers”, “Projects”, “Analytics”).
Next, add your preferred modules: maybe a server monitor, a code IDE panel, a team chat widget, or a calendar/time-tracker. The modularity gives you flexibility; you’re essentially building your digital cockpit.
Proper workspace configuration influences long-term productivity. If modules are poorly organised, you might end up with clutter, distractions or fragmentation defeating the purpose of a unified console.
Add and Manage Integrations & Services
Once your dashboard is set, the next vital step is connecting integrations and external services. Quikconsole Com excels as a unified platform that consolidates disparate tools, eliminating the need for multiple browser tabs. From within the “Integrations” section, select the third-party applications or APIs you want to connect: GitHub, AWS, Trello, Slack, Google Drive, or your CRM system. Authorize connections using OAuth or an API key, then map the data source to the relevant dashboard module. You’ll now see live data streaming directly into your console, bringing everything into one central hub.
Managing these integrations efficiently involves categorizing and labeling each service. Use a clear naming convention like “AWS Production,” “GitHub Repo Main,” or “Slack Engineering.” Set refresh intervals, define notification triggers, and monitor API health to ensure data flow remains consistent. You can also disconnect inactive integrations or reauthorize expired tokens with a single click, maintaining system stability. The ability to add and control integrations on one screen saves hours of administrative time every week.
Integrations in Quikconsole Com not only improve workflow visibility but also enhance collaboration across teams. Developers, analysts, and managers can share the same workspace while maintaining access boundaries. The platform’s entity relationship between integrations and modules forms a structured knowledge graph, ensuring every piece of data, whether it’s code, uptime, or conversation, is semantically linked. This interconnectedness strengthens productivity and ensures complete ecosystem coherence.
Connect Third-Party Tools
One of Quikconsole Com’s strengths is its ability to integrate with tools like cloud providers, version control systems, chat platforms and analytics services. Navigate to the “Integrations” or “Connections” tab from your dashboard.
Choose the service you want (e.g., GitHub, AWS, Slack). Authorise the connection via OAuth or API key. Map the integration to a module inside your workspace so you can view metrics, commits or notifications directly.
By connecting external services, you reduce tool-switching. For example: instead of logging into separate dashboards for hosting, repo and team chat, you bring them into one view saving time and keeping context together.
Create Custom Modules or Widgets
Beyond standard integrations, you might create your own moduleperhaps a script monitor, database health panel or custom report view. In Quikconsole Com you can often choose “Add Module”, pick a widget type, define input sources and set refresh intervals.
Define what you want the module to display (e.g., CPU usage, error logs, GitHub pull-requests, live chat feed). Configure permissions if multiple users share the workspace decide who sees what.
By building custom modules you tailor the console to your unique workflow rather than shoehorning your work into generic layouts. This aligns the console with your actual tasks and allows workflow-specific visualisation.
Monitor Infrastructure and Projects in Real-Time

A defining strength of Quikconsole Com lies in its ability to monitor infrastructure and projects simultaneously in real time. Start by adding your servers, databases, and virtual machines under the “Monitoring” tab. Input each system’s hostname, authentication key, and region. Once configured, you can visualize uptime, response time, CPU load, and memory usage in live dashboards. This level of visibility ensures immediate detection of anomalies, giving you the chance to act before small issues escalate into outages.
Beyond infrastructure monitoring, Quikconsole Com includes project management capabilities designed to integrate operational and strategic layers. You can create boards for each project, define tasks, assign team members, and attach deadlines. Tasks update in real time, showing progress percentages, dependencies, and workload distribution. Notifications keep every stakeholder informed, while project timelines automatically sync with analytics dashboards. This dual functionality allows technical and non-technical teams to operate within the same interface.
Incorporating both infrastructure and project management under one system fosters better coordination and situational awareness. For instance, a deployment failure visible on the server monitor can immediately trigger a ticket in the project board. Teams can collaborate on resolutions directly within Quikconsole Com, removing communication gaps. This full-cycle approach, from issue detection to task completion, transforms your console into a comprehensive operational nerve center.
Set Up System Monitoring
If you are managing servers, VMs or containers, Quikconsole Com allows you to link your infrastructure and monitor health metrics. Begin by adding your servers: input hostnames/IPs, add SSH keys or API tokens, specify polling intervals.
Go to the monitoring module and define thresholds: CPU over 80 %, memory over 90 %, disk space under 10 %. Configure alerting (email, Slack, SMS) when thresholds are crossed.
With real-time monitoring in place, you become proactive rather than reactive. Early detection of issues (e.g., a server spike or memory leak) can prevent downtime or costly outages.
Manage Project Workflow and Collaboration
On the project side, Quikconsole Com supports modules like task boards, time-trackers, revision history and team chats. Create a project board, add tasks, assign them, set due dates and link to your repository or server module.
Enable team collaboration: invite team members, set role-based permissions, enable comments, file attachments and status updates. Use analytics modules to review progress: tasks completed, time logged, blockers identified.
By centralising both infrastructure health and project workflow inside one console, you reduce silos. Your operations team and dev team live in the same environment, share context and respond faster.
Secure Your Console and Establish Best Practices
Security within Quikconsole Com must be treated as a top operational priority. Begin by enabling multi-factor authentication (MFA) for all user accounts. MFA prevents unauthorized access even if passwords are compromised. Next, apply role-based access control (RBAC) to assign permissions according to user responsibility: administrators, developers, analysts, and viewers each have distinct access boundaries. This ensures that sensitive configurations and data are only modified by authorized personnel.
Establishing robust audit trails is equally essential. Activate logging features to record every login attempt, module modification, or data export. These logs not only enhance accountability but also assist with compliance requirements under standards like ISO 27001 or SOC 2. Set up regular security reviews, monthly or quarterly, to detect outdated credentials, unnecessary integrations, or unmonitored modules. Maintaining an updated security posture is key to platform integrity.
Finally, implement a disaster recovery and backup plan. Export your configuration files, module setups, and integration tokens periodically to secure cloud storage. This enables rapid restoration in case of accidental deletion, data corruption, or system migration. When security and backup protocols are enforced, your Quikconsole Com environment evolves from a simple productivity tool into a secure, enterprise-grade management solution built on reliability and trust.
Enable Multi-Factor Authentication and Role Controls
Security is non-negotiable. Immediately enable multi-factor authentication (MFA) for your user account: e.g., authenticator app, SMS code or hardware token.
Set up role-based access:
- Admins: full access, module creation, user management
- Managers: view analytics, moderate tasks
- Operators: limited to specific modules
Ensure inactive user accounts are disabled and conduct periodic reviews.
By implementing MFA and RBAC (role-based access control), you reduce the risk of unauthorized access, insider threats or creeping permissions. Your console becomes resilient.
Conduct Audit Logs and Backup Strategy
Enable audit logging so you can trace actions: who accessed what module, when, and from where. Set up log retention policy and intrusion detection alerts when unfamiliar accounts login or unexpected actions occur.
Define a backup strategy: export critical modules or configuration settings, snapshot server links and workspace layouts, maintain off-site backups of log exports.
Maintaining logs and backups is not optional it’s essential for compliance (GDPR, SOC 2, ISO 27001) and for recovering from incidents. These practices turn the console from a convenience into a secure operational platform.
Optimise Your Workflow with Automation and Analytics
To elevate your efficiency on Quikconsole Com, leverage its built-in automation and analytics engine. Automation transforms repetitive actions into self-triggered sequences. For example, when a new issue appears in GitHub, Quikconsole Com can automatically generate a linked task, notify a Slack channel, and tag the responsible team member. Triggers, actions, and conditions can be set visually, no coding required, allowing users to automate complex sequences in minutes.
Analytics modules then measure performance outcomes. With dashboards showing metrics like mean time to resolution (MTTR), code deployment frequency, or response latency, teams can visualize productivity and operational health. You can also create custom KPIs to track success: for instance, monitoring uptime percentage, ticket resolution rate, or employee utilization hours. These analytics are not static; they adapt in real time as integrations feed new data streams.
By combining automation with analytics, Quikconsole Com becomes not just an operational platform but a performance optimizer. Automated reports, triggered workflows, and data visualization make it possible to refine your digital ecosystem continuously. Every decision is data-driven, every workflow streamlined, and every task measurable, a true synthesis of productivity and intelligence.
Automate Routine Tasks
Quikconsole Com allows you to set automation triggers: for example, send a message when a server’s CPU crosses threshold; auto-deploy code when a commit is merged; archive old tasks once completed for 30+ days.
Define your workflow: input → trigger → action. Example: when a new GitHub issue is created → create task in console board → assign to user → notify Slack channel.
Automation frees you from repetitive work, enables scale and reduces human error. As your team grows, manual workflows become bottlenecks automation helps avoid that.
Use Analytics to Measure Performance
Leverage built-in analytics modules to view dashboards on: monthly server uptime, average task completion time, team activity heat-map, error logs over time.
Create custom KPIs relevant to your operations: mean time to recover (MTTR), number of deployments per week, client-response time, etc. Use these metrics to iterate and improve.
By measuring performance you make data-driven decisions. If you find you have bottlenecks, you can re-configure modules, automate more, or change layout. The console becomes not just a tool, but a growth engine.
Troubleshoot Common Issues and Maintain the Platform
Even the best-managed consoles can experience hiccups. Common issues in Quikconsole Com include integration timeouts, module loading failures, or slow data refresh. Start troubleshooting by checking internet stability and verifying API key validity. Clear your console cache, refresh the browser session, and ensure your workspace version is up-to-date. The “Diagnostics” tab within Quikconsole Com provides a live status of each service, helping you pinpoint the source of problems quickly.
Another crucial aspect of maintenance is module lifecycle management. Over time, certain integrations or modules may become obsolete. Periodically audit your workspace to remove outdated or duplicate elements. Regularly review your logs for recurring errors and address them proactively. This maintenance routine ensures your dashboard remains clean, efficient, and responsive, reflecting only relevant, active workflows.
To sustain long-term performance, schedule routine updates and security patches. Quikconsole Com periodically releases version upgrades with improved stability, features, and API compatibility. Always read update notes before installation to avoid conflicts with existing configurations. Maintenance may seem tedious, but it’s the backbone of operational resilience. A well-maintained console is faster, safer, and more dependable, ready to scale with your future needs.
Address Connectivity & Module-Loading Problems
If modules are not loading or integrations fail: check internet stability, firewall/port rules, API key validity, recent configuration changes.
Clear cache if panels freeze or display stale data. Verify user permissions if a module appears blank (perhaps you lack rights).
Regular checks reduce frustration and downtime: a stuck dashboard panel can mean missing alerts or losing vital context. Proactive troubleshooting keeps the console reliable.
Perform Regular Maintenance & Version Updates
Regularly update your Quikconsole Com workspace: review unused modules, archive obsolete tasks/projects, purge logs older than policy allows, rotate API keys/secrets, check for platform updates.
Keep a change-log of major workspace updates, especially when in a team environment: e.g., layout changes, module additions, access-permission changes.
By treating your workspace like a production system rather than a one-off setup, you ensure longevity, relevance and smooth operation. Neglected consoles expire into messes of outdated modules and deprecated links.
Evaluate Plans, Cost-Effectiveness & Scalability
Before committing fully, it’s important to evaluate the pricing plans and scalability options offered by Quikconsole Com. Begin with the free or trial tier to understand the interface, test integrations, and identify must-have features. Free plans usually include limited modules and integrations, which are sufficient for solo users or small teams. Once you identify performance gaps or scale needs, transitioning to a premium plan unlocks more features such as automation, analytics depth, and larger data storage.
Cost-effectiveness isn’t just about pricing, it’s about matching features to workflow size. Compare the number of users, modules, and API calls supported in each plan. Use the “Usage Metrics” panel to see your current utilization level. Quikconsole Com also allows monthly or annual billing, letting you scale expenses based on project cycles. By understanding your consumption trends, you can allocate resources more efficiently.
Lastly, think long-term scalability. As your team or client base grows, you may need advanced analytics, AI insights, or enterprise-grade API throughput. Quikconsole Com is designed to scale horizontally, adding users, modules, and integrations without service degradation. Investing in the right plan now saves migration time later. Scalability ensures your digital operations evolve with your business, from a startup dashboard to a fully managed enterprise ecosystem.
Compare Free vs Premium Plans
Start with the free tier: evaluate the core features of Quikconsole Com, test integrations, run pilot projects, monitor servers. Understand your needs (team size, number of servers, automation complexity).
Premium tiers typically unlock additional modules, higher limits (servers, users, log retention), priority support, advanced analytics and automation. Select based on your growth plan.
Choosing the correct plan helps cost-control. Scaling prematurely wastes budget; scaling too late limits productivity. Match plan to growth stage.
Plan for Team Growth & Future Needs
Consider future requirements: adding more users, connecting more systems (cloud, on-premise, hybrid), supporting mobile access, incorporating AI-enabled features.
Review the platform’s roadmap (if available) and vendor updates: upcoming mobile apps, expanded integrations, AI-assist modules. These future features matter when you plan three to five years ahead.
By aligning your purchase with long-term growth and scalability, you avoid lock-in, wasted resources or needing to migrate to a different platform just as your team expands.
Summary
Harnessing Quikconsole Com empowers you to centralise dashboards, streamline workflows, integrate tools, monitor infrastructure, automate tasks and scale operations without juggling dozens of separate apps. From the initial sign-up to advanced analytics, from security best-practices to team-growth strategy, every step contributes to a cohesive digital console ecosystem. By treating Quikconsole Com as both a productivity hub and operational nerve-centre, you position yourself and your team for greater efficiency, control and confidence in 2025 and beyond.
Explore more insightful and valuable content on our blog VeoTag.com! Stay updated with helpful tips, expert advice, and in-depth articles that enhance your knowledge.
Read Also:
- CrackStreams: The Rise, Risks, and Reality of Free Sports Streaming
- Rapid Identity CPS: A Complete Guide to Managing Access
- CrackStreams: Legal Risks & Best Alternatives in 2025
- Why Updates Are Important JotechGeeks: Key Benefits & Best Practices
- Ontpress Freshupdates: How It Works, Features
- nippydrive: Ultimate Guide to Features & Alternatives
FAQ’s
Individuals (freelancers, students), small teams, IT/DevOps departments, remote or hybrid organisations. Anyone who needs to centralise tools, monitor infrastructure or streamline workflows.
Basic usage (dashboard setup, task boards, monitoring) is accessible to non-tech users. Advanced features (automation scripts, server links, integrations) benefit from some technical familiarity.
The platform provides encrypted connections, role-based access, audit logs and multi-factor authentication. However, users still carry responsibility for their own password hygiene, API keys and data handling.
Yes the vendor offers tiered plans (Free, Pro, Enterprise) and supports monthly or annual billing. You can scale up or down as needs change.
That’s fine many users adopt only a subset of features. You can use Quikconsole Com simply for task boards, team chat and analytics without adding infrastructure modules.
It may not replace every specialised tool (for example, a full-blown IDE or advanced APM solution). But it can centralise your access, reduce tool-switching and provide a unified command centre for many everyday operations.


